On this page
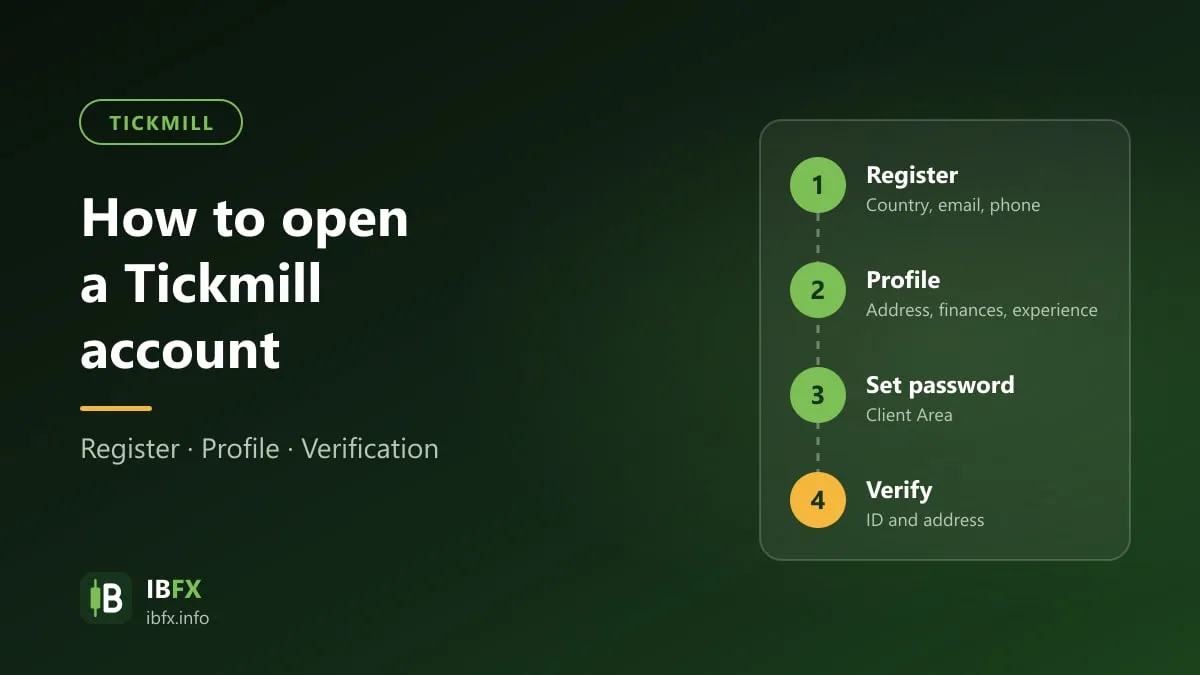
This guide walks through opening an account at Tickmill on a computer and on a phone: registering for the client area, taking the appropriateness test, uploading your verification documents and opening a trading account.
The article was written in 2023 and updated on Sep 14, 2026 from the Tickmill website (the international version), the client area at my.tickmill.com and the Client Services Agreement of Tickmill Ltd (the May 2026 version). The screenshots of each step are of the 2023 interface; the interface today may look different, but the sequence is much the same.
Before you open an account: read the Tickmill review and Is Forex trading legal in Vietnam?. International clients usually open an account with Tickmill Ltd in Seychelles (FSA Seychelles license number SD008); the UK and EU compensation schemes do not apply to that company. Give only your own true details, and start with a demo account.
What to know before you sign up
- You have to be 18 or over. The sign-up page turns away anyone under 18.
- The company that holds your account is set by your country of residence. When you sign up, the client area shows the list of companies (legal entities) you are allowed to register with according to your country of residence. Read the name of the company at this step and in the agreement.
- You have to pass the appropriateness test. Tickmill requires an appropriateness test before it lets you into the client area and lets you open a trading account. Fail three times and you have to wait 365 days before you can take it again.
- Your details have to be true and in Latin characters. Write your full name without diacritics, exactly as it appears on your documents; do not use a temporary email address; give a phone number with the country code (a + sign and at least 9 digits).
- The money has to be in your name. Tickmill does not accept third-party payments; deposits and withdrawals have to use an account, a card or a wallet in your own name.
The documents to prepare
According to the Tickmill FAQ, a personal account needs two kinds of document:
- Proof of identity (POI): a passport, a national ID card or a driving license; a color photo, sharp, showing the whole page and nothing obscured; for an ID card you have to upload both sides.
- Proof of address (POA): a utility bill, a bank statement or another financial document in your name showing the residential address you gave when you signed up. The client area limits how old a proof of address may be (the 2023 version of this article said no more than 180 days); to be safe, use a document from the last 3 months.
Accepted formats: PNG, JPEG, JPG or PDF.
Opening an account on a computer
Step 1: Go to the sign-up page
Go to the Tickmill sign-up page (there is an account opening button at the end of this article too), click Create Account and pick a language if you need to.
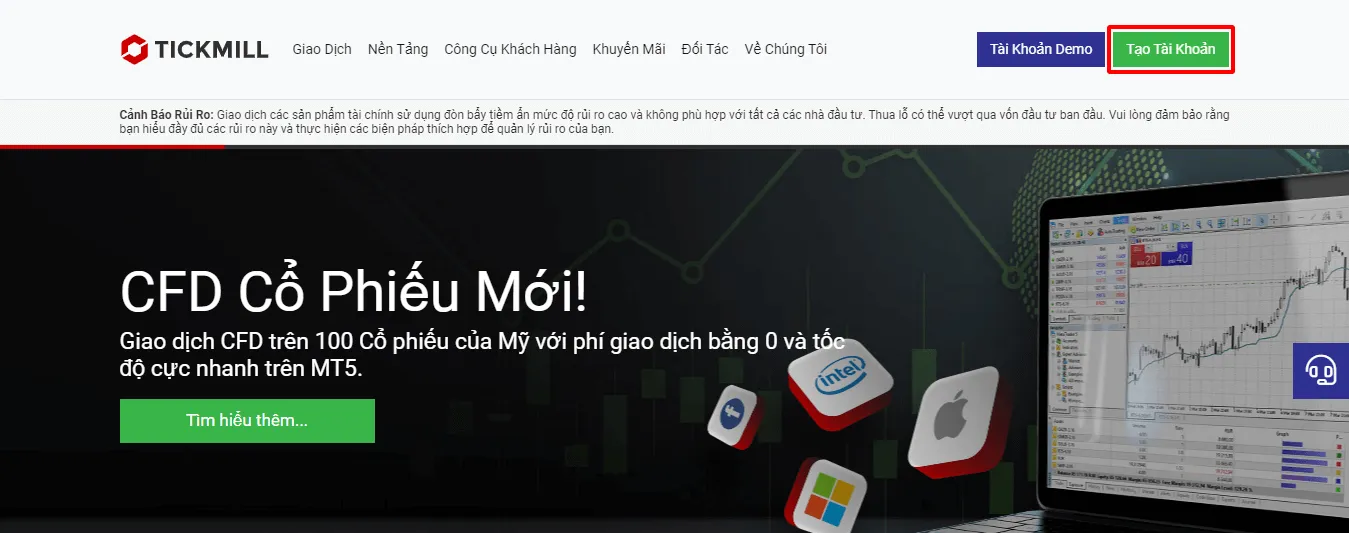
The screenshot shows the Vietnamese-language interface; the buttons and labels sit in the same places in the English one.
Step 2: Fill in your personal details
Fill in your country of residence, your full name, your email address, your phone number and your date of birth; pick the individual client type. Your country of residence decides which company holds your account and which base currency you may choose (USD, EUR, GBP; ZAR is for residents of South Africa only).
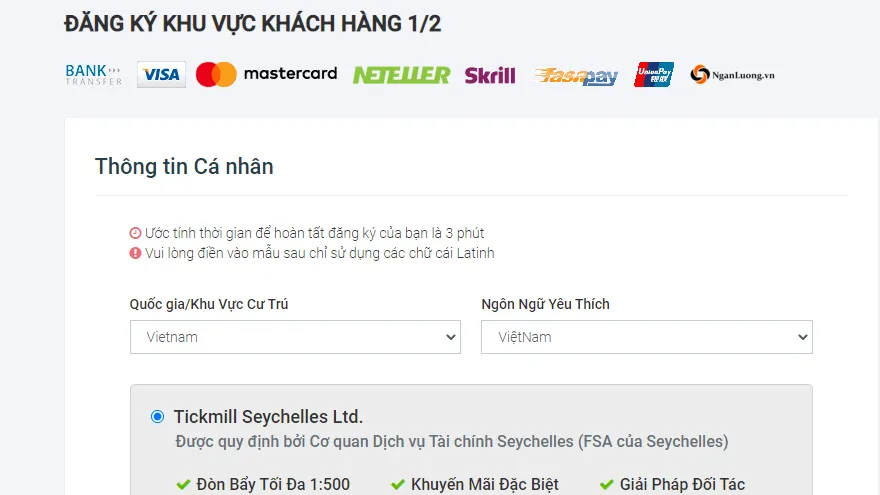
The screenshot shows the Vietnamese-language interface; the buttons and labels sit in the same places in the English one.
Step 3: Address, financial details and the appropriateness test
Address: country of residence, province or city, house number and street, postcode, and a tax identification number if you have one. Give exactly the address that appears on the proof of address you are going to upload.
Tax check: your nationality, and the question of whether you are a US citizen for tax purposes.
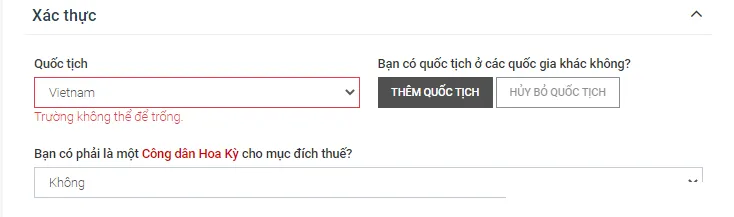
The screenshot shows the Vietnamese-language interface; the buttons and labels sit in the same places in the English one.
Personal and financial details: your level of education, your employment, your line of business, your source of funds, your total annual income, your total assets, your trading volume and frequency over the last 12 months, and your trading objective.
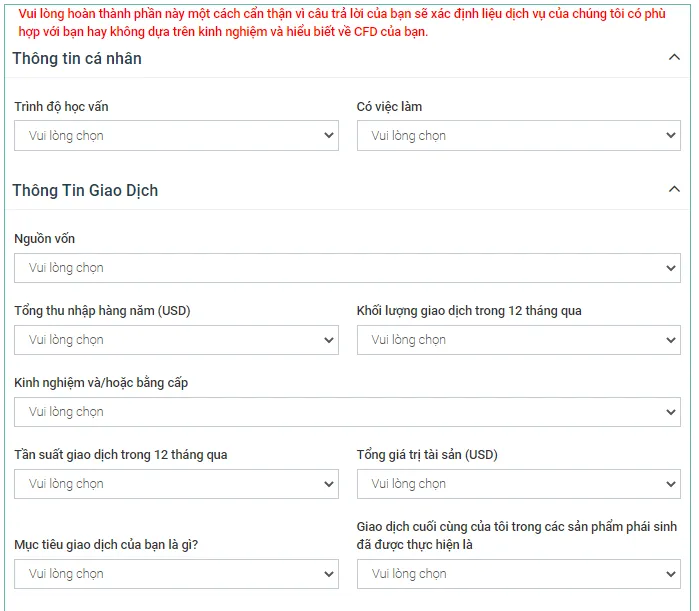
The screenshot shows the Vietnamese-language interface; the buttons and labels sit in the same places in the English one.
Trading experience and the appropriateness test: answer the questions on your knowledge of CFDs, leverage and margin. Answer honestly; the point of the test is to establish whether you understand the risk of a leveraged product. If you are not sure about the concepts, read the IBFX guides on what leverage is and on what a lot is first, because three failures mean a wait of 365 days.
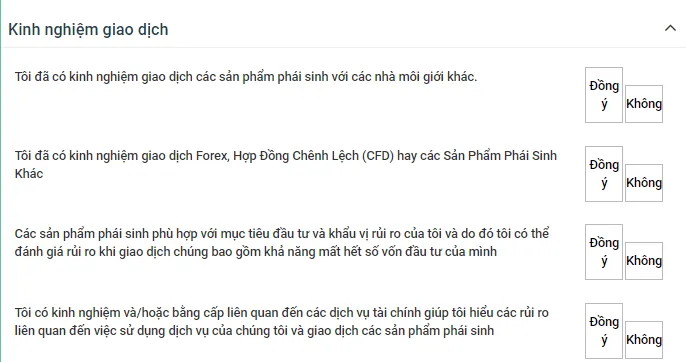
The screenshot shows the Vietnamese-language interface; the buttons and labels sit in the same places in the English one.
Your client area password: create a password that meets the requirements shown on screen (the 2023 version of this article said: at least 12 characters, with an upper-case letter, a lower-case letter, a digit and a special character), then click Open Account.
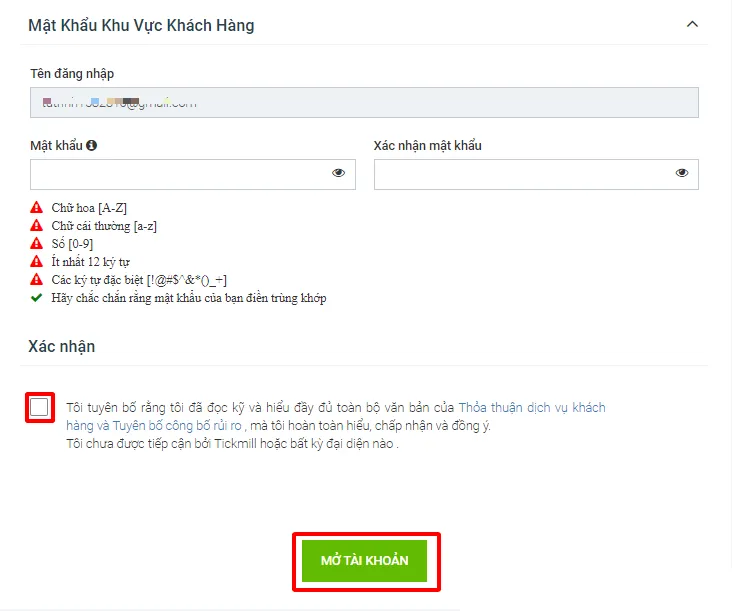
The screenshot shows the Vietnamese-language interface; the buttons and labels sit in the same places in the English one.
Step 4: Upload your verification documents
Log in to the client area and upload your identity document and your proof of address (click Browse to pick the file, then Upload). The client area says the documents will be reviewed within 1 business day.
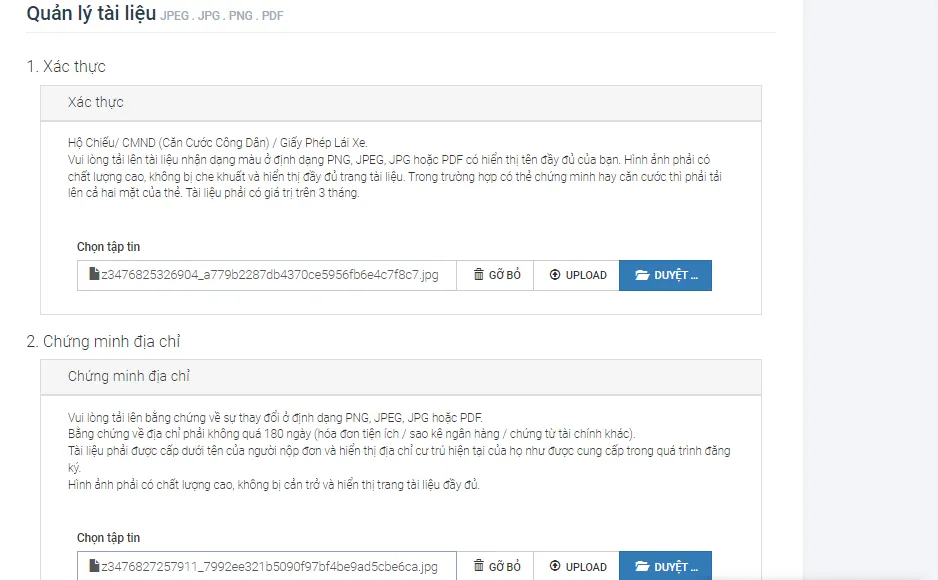
The screenshot shows the Vietnamese-language interface; the buttons and labels sit in the same places in the English one.
Step 5: Open a trading account
Once your file has been approved, open a live trading account:
- Log in to the client area.
- Go to Trading Accounts and click Add Trading Account.
- Pick the platform (MT4, MT5 or Tickmill Trader), the account type (Classic or Raw), the currency and the leverage, following the instructions on screen. If there is an IB code field, enter the code your introducer gave you or leave it empty.
A few things worth knowing as you choose:
- Classic charges no commission and has a spread from 1.6 pips; Raw has a spread from 0.0 pips and a commission of 3 USD per lot per side on MT4/MT5 (3.5 USD on Tickmill Trader). The detailed comparison is in the Tickmill review.
- Pick low leverage. Tickmill uses dynamic leverage up to 1:1000 on MT5 and Tickmill Trader; high leverage lets you open a larger position relative to your capital, and it does not reduce risk.
- Each client may have at most 7 live trading accounts across TradingView, MT4, MT5 and Tickmill Trader. When you open a live Tickmill Trader account, a demo account is created alongside it; TradingView is logged into with your Tickmill Trader account details.
- An account you stop using will be archived: an account with a balance of 50 USD or less and no activity is moved to the inactive accounts section (MT4/MT5 after 60 days, Tickmill Trader/TradingView after 30 days), and the balance is moved to the wallet.
Your platform login details (account number, password, server) are sent to you by email. The next thing to do is deposit money into the wallet and transfer it to the trading account.
Opening an account on a phone
There are two ways:
- The Tickmill app: download it from Google Play or the App Store, then sign up, open an account, deposit, withdraw, transfer money and trade in a single app, logging in with a fingerprint or your face. Only download it from the official app stores.
- A phone browser: the steps are the same as on a computer. The screenshots that follow are of the 2023 interface.
Step 1: go to the Tickmill sign-up page and tap to create an account.

The screenshot shows the Vietnamese-language interface; the buttons and labels sit in the same places in the English one.
Step 2: fill in your personal details.
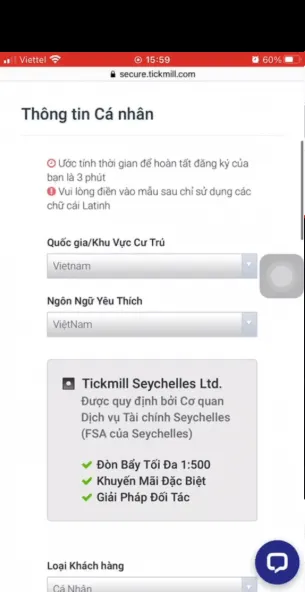
The screenshot shows the Vietnamese-language interface; the buttons and labels sit in the same places in the English one.
Step 3: fill in your address and your financial details, and take the appropriateness test.
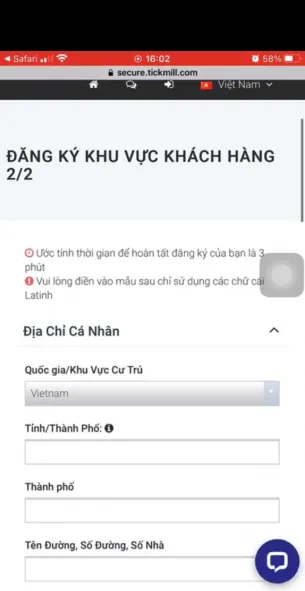
The screenshot shows the Vietnamese-language interface; the buttons and labels sit in the same places in the English one.
Step 4: upload your verification documents, wait for approval, then open a trading account.
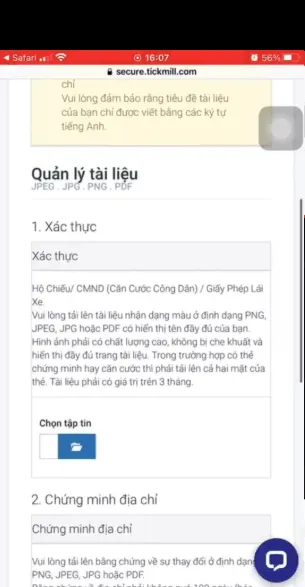
The screenshot shows the Vietnamese-language interface; the buttons and labels sit in the same places in the English one.
A demo account
If you want to practice first, you can open a demo account on the Tickmill Demo Account page, or use the demo account that comes with a Tickmill Trader account. Tickmill limits how many demo accounts one person may have. Set your demo balance close to the amount you intend to deposit for real, so that you practice with the right position size.
Keeping your account safe
- Only log in to the client area from the official Tickmill website or app; check the address of the page before you type your password.
- Tickmill states plainly that it never asks for your full card number, your CVV or your PIN. Do not give your password or a verification code to anyone, including anyone claiming to be staff or an IB of the broker.
- Do not let anybody else trade for you. See how to spot Forex scams.
Closing thoughts
Opening a Tickmill account means preparing your documents, answering the appropriateness test honestly and waiting about 1 business day for your file to be approved. Remember three things: read the name of the company that holds your account when you sign up, pick low leverage when you open the trading account, and practice on a demo account before you deposit real money. When you are ready, you can open a Tickmill account through our referral link.